• Why Homemade Vanilla Stays Weak (And What Actually Affects Flavor)

    Why Homemade Vanilla Stays Weak (And What Actually Affects Flavor)

    If you’ve made homemade vanilla extract and found that it still tastes weak weeks or even months later, you’re not alone. This is one of the most common frustrations people have with DIY vanilla — and it’s also one of the most misunderstood.

    Most people assume weak vanilla means they did something wrong. The recipe must be off. The beans must be bad. It just needs more time.

    In reality, homemade vanilla usually stays weak for very specific, predictable reasons. And once you understand them, the problem stops being mysterious.

    This article breaks down what actually affects vanilla flavor, why waiting longer often doesn’t fix it, and how to tell whether your vanilla will ever improve at all.


    Time Alone Does Not Create Strength

    One of the biggest myths around homemade vanilla is that time automatically equals strength. While time does matter, it only amplifies what’s already there.

    If your extract starts weak, letting it sit longer usually just gives you more weak vanilla.

    Time helps when:

    • Enough vanilla compounds are present to extract
    • The alcohol is strong enough to pull those compounds
    • The bean-to-alcohol ratio is correct

    If any of those factors are off, time can’t compensate. It simply preserves the imbalance.

    This is why some homemade vanilla smells pleasant but still tastes thin. Aroma develops faster than depth, and without enough dissolved vanillin and supporting compounds, the flavor never fully builds.

    Wide-mouth mason jar with a vanilla bean soaking in darkened alcohol, showing stalled flavor development over time

    The Bean-to-Alcohol Ratio Matters More Than Most Recipes Admit

    Many popular recipes dramatically underuse vanilla beans. They rely on the idea that patience will make up the difference.

    It won’t.

    For baking-grade vanilla, strength is determined primarily by how much vanilla material is available to extract — not how long it sits.

    If you want a deeper explanation of correct ratios and why most DIY recipes fall short, this is covered in detail in How to Make Homemade Vanilla Extract (Better Than Store-Bought).

    When the ratio is too low:

    • The extract smells okay but tastes flat
    • Flavor disappears in baked goods
    • The vanilla never reaches store-bought strength

    This is the most common reason homemade vanilla stays weak indefinitely.


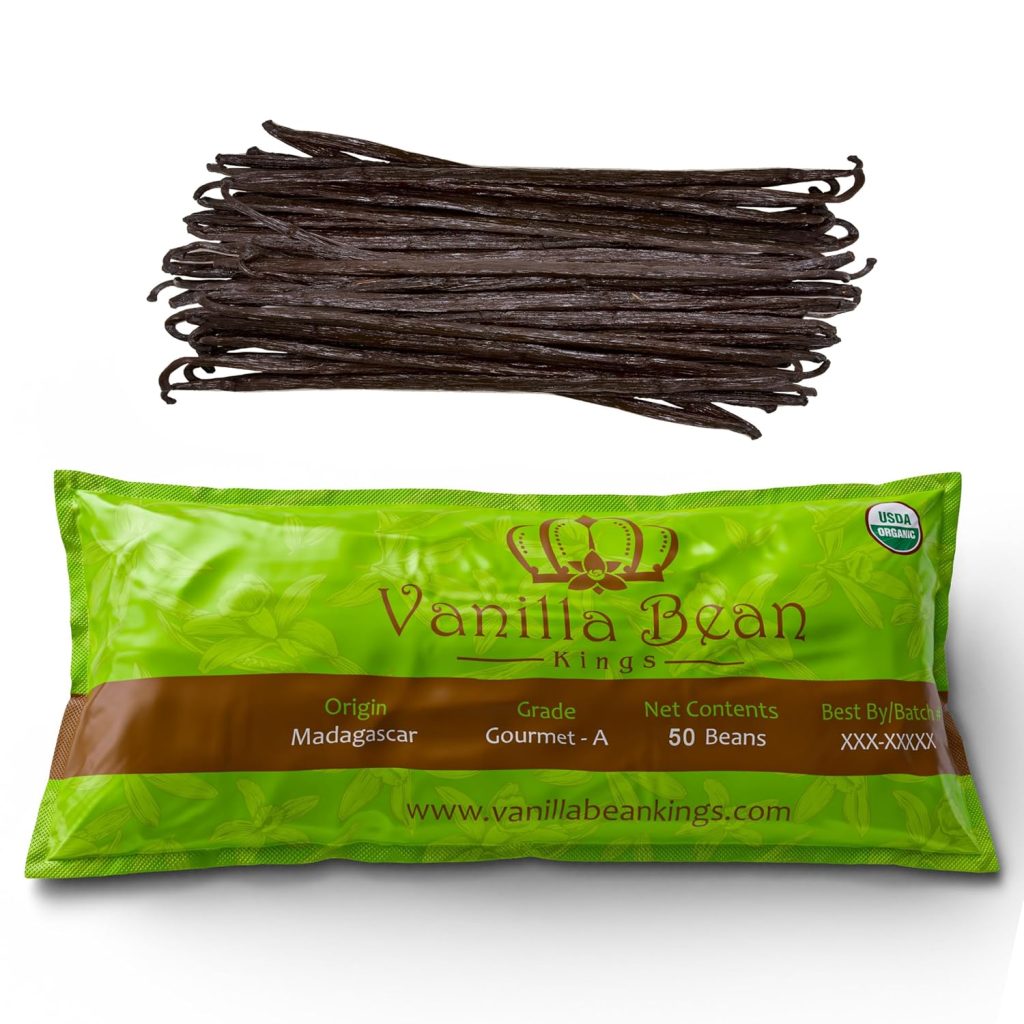
    Bean Quality Affects Development, Not Just Price

    Another misconception is that all vanilla beans behave the same. They don’t.

    Different grades, curing levels, and moisture contents extract differently. Some beans release flavor quickly but plateau early. Others develop more slowly but reach greater depth.

    Choosing the wrong type of bean can make it seem like your vanilla has stalled, even when you followed the recipe closely.

    If you want to understand how bean selection impacts flavor strength and long-term development, see Best Vanilla Beans for Homemade Extract (Grade A vs Grade B).
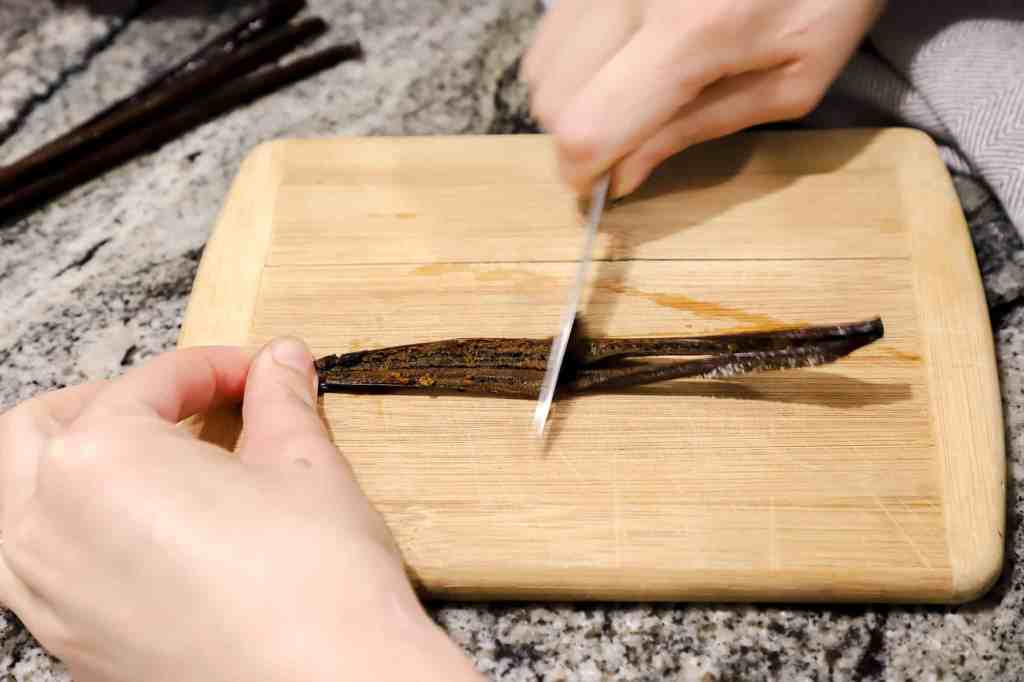
    In short:

    • Softer, moister beans are easier for beginners
    • Drier beans often need more alcohol contact and time
    • Bean choice affects how flavor develops, not just how fast

    Alcohol Strength Sets the Ceiling

    Alcohol isn’t just a preservative. It’s the extraction engine.

    If the alcohol used is too weak, it cannot fully dissolve the compounds responsible for strong vanilla flavor. This creates an artificial ceiling — no matter how long you wait, the extract will never pass a certain point.

    This is why some homemade vanilla smells rich in the bottle but underperforms in recipes. The volatile compounds escaped into the aroma, but the deeper flavor compounds never fully transferred.

    Once that ceiling is set, waiting longer won’t raise it.


    Why Vanilla Sometimes Smells Stronger Than It Tastes

    Smell and taste develop differently.

    Your nose detects volatile compounds quickly, even at low concentrations. Your palate needs density and balance.

    This disconnect causes people to believe their vanilla is stronger than it actually is. The aroma suggests progress, but the flavor hasn’t caught up — and may never catch up without changes.

    This is one reason homemade vanilla is often praised early, then quietly disappointing later.


    What Weak Vanilla Is Not Caused By

    To avoid chasing the wrong fixes, it helps to rule out a few common myths:

    • It is not caused by artificial vanilla ingredients or additives
    • It is not related to food myths like animal-derived flavorings
    • It is not fixed by shaking the bottle more often

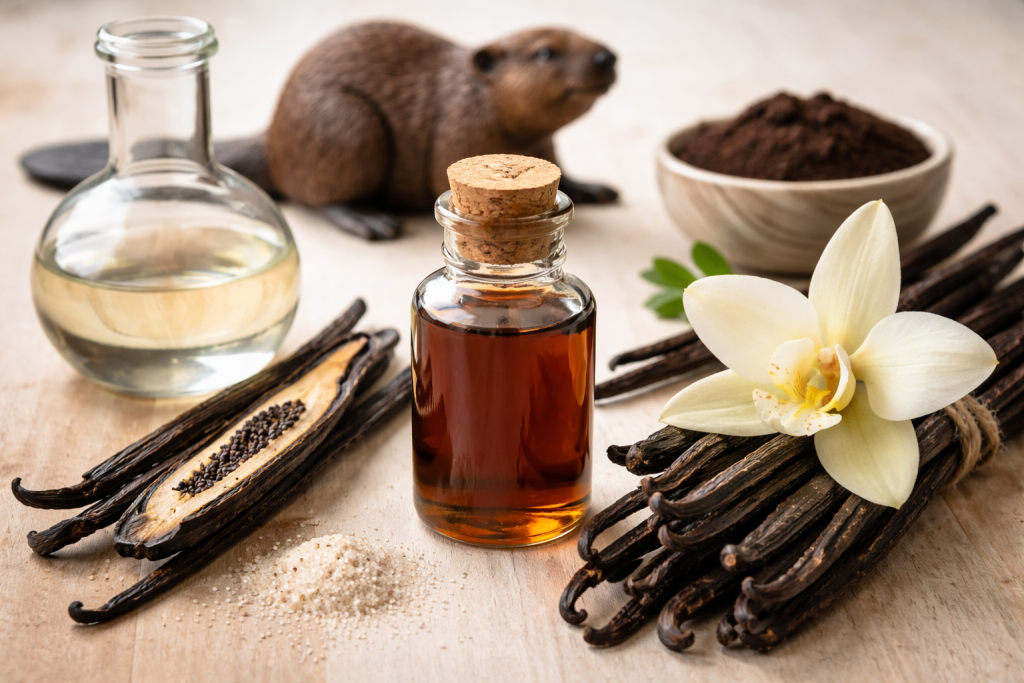
    If you’re curious about one of the most persistent vanilla myths and why it continues to circulate, you can read No, Artificial Vanilla Is Not Made From Beaver Glands (Here’s the Truth).

    That misconception has nothing to do with why homemade vanilla lacks strength.


    How to Tell If Your Vanilla Will Ever Improve

    Ask yourself three questions:

    1. Did I use enough beans for the amount of alcohol?
    2. Is the alcohol strong enough for full extraction?
    3. Are the beans appropriate for long-term development?

    If the answer to any of these is no, the vanilla may never reach the strength you expect — regardless of how long it sits.

    At that point, the solution isn’t more patience. It’s correction.


    The Takeaway

    Homemade vanilla stays weak because of limitations set early in the process. Time doesn’t create flavor from nothing — it only reveals whether the foundation was strong enough to begin with.

    When the ratios are correct, the beans are appropriate, and the alcohol can do its job, homemade vanilla does improve. When they aren’t, it simply plateaus.

    Understanding this prevents wasted time, wasted ingredients, and frustration — and it allows homemade vanilla to perform the way people expect it to.

  • Are DIY Plug-In Refills Safe? What You Should and Shouldn’t Use

    Disclosure: As an Amazon Associate, I earn from qualifying purchases. If you click and make a purchase, I may receive a small commission at no additional cost to you.

    DIY plug-in refill safely installed in wall outlet

    DIY plug-in refills can be safe — but only when they’re made correctly.

    Most safety concerns don’t come from the plug-in device itself. They come from using the wrong ingredients, incorrect dilution ratios, or liquids that were never designed to be heated.

    When you use the proper base oil and the correct mixing ratio, DIY plug-in refills can perform just as safely as store-bought versions.

    In this guide, you’ll learn:

    • What actually makes plug-ins unsafe
    • Which ingredients you should never use
    • The safest base oil option
    • How to mix DIY refills properly

    Are DIY Plug-In Refills Inherently Unsafe?

    No. DIY plug-in refills are not unsafe by default.

    Store-bought refills rely on simple principles:

    • Controlled, steady heat
    • A wick that draws liquid upward
    • A stable carrier oil
    • A balanced fragrance concentration

    Problems happen when DIY versions ignore those same principles.

    Safety depends on:

    • Ingredient choice
    • Liquid consistency
    • Fragrance concentration
    • Proper use of the plug-in device

    If you’re noticing your refills fading quickly rather than causing safety concerns, this guide explains why that happens and how to fix it:

    👉 Why DIY Plug-In Air Fresheners Stop Working After a Few Days


    The Safest Base for DIY Plug-In Refills

    The most important safety factor is the base oil.

    The safest option for most DIY plug-in refills is:

    👉 Fractionated Coconut Oil (FCO)

    Why?

    • Lightweight and stable
    • Nearly odorless
    • Slower evaporation than alcohol
    • Less likely to clog wicks
    • Designed to carry fragrance evenly

    When combined with fragrance oil at the correct ratio — 75% fractionated coconut oil and 25% fragrance oil — it provides consistent diffusion without overheating or burning off too quickly.

    If you’re unsure how to mix it properly, here’s the full breakdown:

    👉 The One Ingredient That Makes DIY Plug-In Refills Actually Work

    If you don’t already have a high-quality fractionated coconut oil, this is the one that works best for plug-in refills:

    👉 Check current price on Amazon


    Ingredients You Should Never Use in Plug-Ins

    Some common DIY ingredients can create real safety issues when heated.

    Water

    Water does not diffuse properly in plug-in devices. It can interrupt evaporation, cause uneven heating, and potentially damage internal components.

    Alcohol

    Alcohol evaporates too quickly and can burn hotter than intended. It is not recommended for heated plug-in devices and may increase the risk of overheating.

    Thick or Cooking Oils

    Oils like olive oil, vegetable oil, or other heavy cooking oils are too thick. They can clog the wick, restrict airflow, and interfere with proper evaporation.

    If a liquid was not designed for controlled evaporation, it should not be used in a heated plug-in system.

    Fractionated coconut oil and other oils for DIY plug-in refills

    Why the Wick Matters for Safety

    Plug-in devices rely on a wick to draw liquid upward for gradual evaporation.

    If the liquid is:

    • Too thick → the wick can clog
    • Too thin → it evaporates too quickly
    • Improperly mixed → it diffuses unevenly

    Using a stable carrier oil like fractionated coconut oil and maintaining a 75/25 blend helps protect the wick and ensures consistent performance.


    Essential Oil Safety in Plug-Ins

    Essential oils can be used in plug-in refills, but concentration matters.

    Using too much can cause:

    • Strong, overwhelming scent
    • Faster evaporation
    • Increased wick stress

    Safer use means:

    • Keeping fragrance concentration controlled (25% or less)
    • Using high-quality oils
    • Avoiding unknown additives

    More oil does not mean better performance.


    Can DIY Plug-In Refills Damage the Device?

    Damage usually occurs when:

    • The wrong liquids are used
    • The wick becomes clogged
    • The device is overfilled
    • Improper ingredients create residue

    When refills are formulated correctly and the device is used as instructed, damage risk is minimal.

    If a plug-in stops working properly, unplug it and inspect the wick and bottle.


    How to Use DIY Plug-In Refills Safely

    Follow these basic guidelines:

    • Use only appropriate carrier oils
    • Maintain a 75% base oil / 25% fragrance ratio
    • Avoid overfilling the bottle
    • Keep devices upright at all times
    • Replace wicks if they appear clogged

    Proper formulation determines safety — not whether it’s DIY.

    Properly positioned DIY plug-in air freshener in wall outlet

    When DIY Plug-Ins May Not Be a Good Idea

    DIY refills may not be appropriate if:

    • You are sensitive to essential oils
    • You prefer non-heated fragrance systems
    • You are unwilling to measure ratios accurately

    In those cases, consider reed diffusers or other non-heated fragrance options.


    The Bottom Line: DIY Plug-Ins Are Safe When Made Correctly

    They become unsafe when:

    • The wrong ingredients are used
    • Ratios are incorrect
    • Devices are misused

    Using a proper base like fractionated coconut oil and maintaining a 75/25 blend significantly reduces common safety risks.

    If you want to make sure your refills are mixed correctly and perform consistently, start here:

    👉 The One Ingredient That Makes DIY Plug-In Refills Actually Work

    With the right ingredients and method, DIY plug-ins can be both safe and effective.


    Related DIY Plug-In Guides

  • Why DIY Plug-In Air Fresheners Stop Working After a Few Days

    Disclosure: This post may contain affiliate links. If you click and make a purchase, I may earn a small commission at no extra cost to you.

    DIY plug-in air freshener with refill bottle in wall outlet

    If your DIY plug-in refill smells strong at first but fades within a few days, you’re not imagining things.

    This is one of the most common frustrations with homemade plug-in refills — and it almost always comes down to formulation.

    Plug-ins stop working when:

    • The base evaporates too quickly
    • The wick cannot draw liquid properly
    • The fragrance concentration is unbalanced
    • The mixture wasn’t designed for controlled heat

    Let’s break down exactly what’s happening — and how to fix it.


    The Most Common Reason DIY Plug-Ins Fail

    Most DIY recipes focus only on fragrance strength.

    They assume:
    “More essential oil = stronger scent.”

    That’s not how heated plug-in systems work.

    Plug-ins rely on controlled evaporation.

    When you use essential oils alone or mix fragrance incorrectly:

    • The liquid burns off too quickly
    • The wick dries out
    • Diffusion becomes inconsistent
    • The scent disappears in days

    If you want the exact mixing method that prevents this, start here:

    👉 The One Ingredient That Makes DIY Plug-In Refills Actually Work


    Why Essential Oils Alone Are Not Enough

    Essential oils are highly concentrated, but they are not designed to be used alone in heated plug-in devices.

    Without a proper carrier:

    • They evaporate unevenly
    • They can overwhelm the wick
    • They burn off quickly
    • Scent longevity suffers

    This is why many DIY refills smell strong for 24–48 hours… then fade.

    The issue isn’t the oil quality.

    It’s the lack of a stable base.


    The Wick Problem Most DIY Recipes Ignore

    Plug-in air freshener bottle with clogged wick and low liquid level

    Inside every plug-in air freshener is a wick that draws liquid upward at a controlled rate. That wick is designed to work with a specific type of liquid consistency.

    If the refill is too thin:

    • It wicks too fast
    • The fragrance burns off quickly

    If the refill is too thick:

    • The wick may struggle to absorb the liquid
    • Scent release becomes inconsistent or stops entirely

    Most DIY recipes never address this balance, which is why results can vary so widely.

    If your mixture is properly balanced but the plug-in still isn’t diffusing correctly, the wick itself may be clogged or degraded. Over time, residue buildup can restrict liquid flow and weaken scent output.

    👉 Check compatible replacement plug-in wicks on Amazon

    That said, most performance problems are caused by an unbalanced formulation — not hardware failure.

    A properly functioning refill needs:

    • A carrier that supports steady wicking
    • Oils blended at the correct ratio
    • A liquid that can tolerate gentle, continuous heat

    Why Plug-Ins Sometimes Smell Strong at First

    At the beginning, excess fragrance sits near the top of the wick.

    When first plugged in, that concentration releases quickly — creating the illusion of strong performance.

    But once that top layer burns off:

    • There’s no balanced base to sustain diffusion
    • The wick dries faster
    • The scent drops dramatically

    This is a formulation issue, not a device failure.


    How to Make DIY Plug-In Refills Last Longer

    To improve longevity:

    • Use a proper carrier oil
    • Avoid water or alcohol mixtures
    • Maintain a controlled fragrance concentration
    • Follow measured ratios instead of guessing

    The most reliable formula is:

    75% fractionated coconut oil
    25% fragrance oil

    Fractionated coconut oil (FCO):

    • Slows evaporation
    • Supports proper wick function
    • Maintains stable diffusion
    • Reduces clogging

    If you don’t already have a stable base oil, this is the one that works best for plug-in refills:

    👉 Check current price on Amazon

    For the full step-by-step mixing breakdown, start here:

    👉 The One Ingredient That Makes DIY Plug-In Refills Actually Work


    When You Might Need to Replace the Wick

    Replacement wicks for plug-in air freshener refill bottles

    If your mixture is correct but performance is still weak:

    • The wick may be clogged
    • Residue buildup may be restricting flow
    • The refill bottle may not be wicking properly

    Over time, wicks can degrade.

    Replacing the wick can restore performance — but most longevity problems stem from improper mixture ratios, not hardware failure.


    closer to store-bought versions without the synthetic additives.


    The Bottom Line

    DIY plug-in refills do not stop working because the idea is flawed.

    They stop working because:

    • The formulation is unbalanced
    • The wrong base is used
    • Evaporation isn’t controlled

    When you use the correct carrier oil and maintain a 75/25 ratio, DIY refills can last significantly longer and perform more consistently.

    If you’re also concerned about safety, read this next:

    👉 Are DIY Plug-In Refills Safe? What You Should and Shouldn’t Use

    And if you want the exact formula that fixes most performance issues:

    👉 The One Ingredient That Makes DIY Plug-In Refills Actually Work


    Related DIY Plug-In Guides


  • Best Vanilla Beans for Homemade Extract (Grade A vs Grade B)

    Affiliate Disclosure:
    This post may contain affiliate links. As an Amazon Associate, I earn from qualifying purchases at no additional cost to you.


    Why Vanilla Bean Choice Matters More Than Most Recipes Admit

    Many homemade vanilla recipes focus on the method but barely mention the vanilla beans themselves. In reality, the type and grade of vanilla beans you use has a bigger impact on flavor strength than almost any other factor.

    If your homemade vanilla has ever turned out weak or disappointing, the problem is often the beans—not the process.

    This guide breaks down the difference between Grade A vs Grade B vanilla beans, which type works best for homemade extract, and how to choose beans that deliver strong, baking-grade flavor.


    Quick Picks for Homemade Vanilla Extract


    If you’re new to making vanilla extract, this guide walks through the full process step by step: How to Make Homemade Vanilla Extract (Better Than Store-Bought).


    Grade A vs Grade B Vanilla Beans: What’s the Difference?

    Vanilla beans are typically sold in two main grades. Both come from the same plant, but they are harvested and prepared differently.

    Grade A Vanilla Beans (Often Called “Gourmet”)

    Grade A beans are:

    • Plumper and more moist
    • Higher in water content
    • Often used for cooking, desserts, or visual presentation

    Because they contain more moisture, Grade A beans are usually better for recipes where the beans themselves are visible or scraped directly into food.


    Grade B Vanilla Beans (Often Called “Extract Grade”)

    Grade B beans are:

    • Drier and less plump
    • Lower in moisture
    • More concentrated in flavor compounds

    This lower moisture content is exactly what makes them ideal for homemade vanilla extract. Alcohol extracts flavor compounds more efficiently from drier beans, resulting in a stronger extract over time.

    FeatureGrade A BeansGrade B Beans
    MoistureHighLower
    Best UseCooking/DessertsExtract
    Flavor StrengthMildStrong
    Cost EfficiencyLowerHigher

    Which Vanilla Beans Are Best for Homemade Extract?

    The Short Answer

    Grade B vanilla beans are the best choice for homemade vanilla extract.

    They produce:

    • Stronger flavor
    • Better extraction
    • More consistent results
    • Lower cost per batch

    Grade A beans will still work, but you often need more of them to achieve the same flavor strength.


    Flavor Differences You Can Expect

    When properly aged, vanilla extract made with Grade B beans tends to have:

    • Deeper aroma
    • Stronger vanilla presence in baked goods
    • Better performance in cookies, cakes, and frostings

    Grade A beans can produce a slightly softer flavor, which some people prefer for lighter desserts, but they are not necessary for most baking applications.


    How Many Vanilla Beans Do You Actually Need?

    For baking-grade vanilla extract, a good rule of thumb is:

    • 10–12 vanilla beans per 8-ounce jar

    Using fewer beans is the most common reason homemade vanilla turns out weak. This applies regardless of grade, but it’s especially important when using Grade A beans.

    If you want a deeper dive into ratios and aging time, see:
    How to Make Homemade Vanilla Extract (Better Than Store-Bought)


    Best Vanilla Bean Types for Extract

    Beyond grading, vanilla beans also vary by origin. The most common types used for extract include:

    Madagascar Vanilla Beans

    • Classic vanilla flavor
    • Rich, creamy, and familiar
    • Excellent all-purpose choice for baking

    Tahitian Vanilla Beans

    • More floral and aromatic
    • Slightly lighter vanilla flavor
    • Better for desserts where vanilla is the star

    Mexican Vanilla Beans

    • Bold and slightly spicy
    • Works well in chocolate-based baked goods

    For most home bakers, Madagascar vanilla beans are the most versatile and reliable option for extract.


    Where to Buy Vanilla Beans for Homemade Extract

    When sourcing vanilla beans, consistency and freshness matter more than branding.

    Look for beans that are:

    • Flexible (not brittle)
    • Free from mold
    • Sold specifically as Grade B or extract grade

    Quality beans make a noticeable difference in both flavor and aging performance.


    Grade A vs Grade B: Which Should You Choose?

    Choose Grade B if:

    • You’re making vanilla extract
    • You want the strongest flavor
    • You care about cost efficiency
    • You bake regularly

    Choose Grade A if:

    • You plan to scrape seeds directly into recipes
    • Appearance matters more than extraction efficiency
    • You’re not primarily making extract

    For most people making homemade vanilla extract, Grade B beans are the clear winner.


    How Bean Choice Affects Aging Time

    Vanilla made with Grade B beans typically:

    • Develops flavor faster
    • Reaches baking strength sooner
    • Continues improving for months

    This makes Grade B beans ideal if you plan to use your vanilla within the first 3–6 months and continue topping it off over time.


    Final Thoughts: Don’t Underspend on the Wrong Ingredient

    Homemade vanilla extract only has two main ingredients: vanilla beans and alcohol. If you invest in the right beans, everything else falls into place.

    Using extract-grade vanilla beans ensures:

    • Stronger flavor
    • Better value
    • Consistent baking results

    If you haven’t already, start with the full method here:
    How to Make Homemade Vanilla Extract (Better Than Store-Bought)


    Related Guides

    • Why Most Homemade Vanilla Is Weak
    • Is Vanilla Really Made From Beaver Glands?
    • Real Vanilla With Just Two Ingredients
  • No, Artificial Vanilla Is Not Made From Beaver Glands (Here’s the Truth)

    Affiliate Disclosure:
    This post may contain affiliate links. As an Amazon Associate, I earn from qualifying purchases at no additional cost to you.

    If you’ve ever searched for information about artificial vanilla flavoring, you’ve probably come across a shocking claim: that it’s made from beaver glands. While this idea circulates widely online, it is not accurate for modern food products.

    Let’s clear up where this myth came from — and what artificial vanilla flavoring is actually made from today.


    Where the Beaver Gland Myth Came From

    The confusion comes from a substance called castoreum, which is a secretion produced by beavers. Historically, castoreum has been used in very small quantities in perfumes and fragrances and is classified by the FDA as a “natural flavoring.”

    That historical fact is where the myth starts — and where it should end.


    Why Beaver Glands Are Not Used in Vanilla Flavoring Today

    While castoreum exists, it is not used in modern vanilla flavoring, artificial or otherwise.

    Here’s why:

    • It is extremely rare and expensive
    • It is impractical for large-scale food production
    • It is not used by commercial vanilla manufacturers
    • It does not appear in ingredient lists for vanilla flavoring

    In short: beaver gland products are not part of modern artificial vanilla production.


    What Artificial Vanilla Flavoring Is Actually Made From

    Most artificial vanilla flavoring is made using synthetic vanillin — a single compound that mimics vanilla’s primary aroma.

    Synthetic vanillin is commonly derived from:

    • Chemical synthesis
    • Industrial byproducts such as lignin (from wood pulp)
    • Laboratory-created aromatic compounds

    This produces a vanilla-like smell and taste, but it lacks the complexity of real vanilla.


    Real Vanilla vs Artificial Vanilla: The Key Difference

    Vanilla beans naturally contain hundreds of flavor compounds, which create depth, warmth, and complexity — especially when baked.

    Artificial vanilla flavoring typically delivers:

    • One dominant flavor note
    • Less depth
    • Less heat stability
    • A flatter overall taste

    That’s why many bakers notice a difference when switching to real or homemade vanilla extract.


    Why Homemade Vanilla Is a Better Alternative

    If you want full control over ingredients and flavor, making homemade vanilla extract is the simplest upgrade you can make. Unlike artificial flavoring, it uses real vanilla beans and improves with time.


    The Bottom Line

    The claim that artificial vanilla flavoring comes from beaver glands is outdated and misleading. Modern artificial vanilla is made using synthetic vanillin — not animal-derived ingredients.

    That said, artificial vanilla still lacks the depth and complexity of real vanilla beans. If flavor matters to you, making your own vanilla extract is one of the easiest upgrades you can make in the kitchen.


    Related Reading

  • How to Make Homemade Vanilla Extract (Better Than Store-Bought)

    Affiliate Disclosure:
    This post may contain affiliate links. As an Amazon Associate, I earn from qualifying purchases at no additional cost to you.

    If you bake regularly, vanilla is one of the most important ingredients in your kitchen — and one of the easiest to upgrade. Many store-bought vanilla products rely on artificial flavoring that doesn’t deliver the depth or strength real vanilla provides in baking.

    Homemade vanilla extract is simple to make, affordable, and produces a richer flavor that improves over time. When made correctly, it creates a baking-grade extract that performs better than most store-bought options and permanently replaces artificial vanilla in your pantry.

    The Easiest Way to Get Started

    If you want baking-grade vanilla that actually tastes strong, this is the type of vanilla beans most home bakers start with because they infuse quickly and hold flavor well.

    Grade A Vanilla Pods for Vanilla Extract

    👉 Check current price on Amazon


    Quick Picks for Homemade Vanilla Extract

    Best Vanilla Beans for Baking
    Quality vanilla beans are the single biggest factor in flavor strength and baking performance.

    Best Alcohol for Vanilla Extract
    A high-proof neutral spirit extracts flavor compounds more efficiently and preserves the extract long-term. Vodka is the most common choice because it allows the vanilla flavor to shine without adding competing notes.

    Best Bottles for Storage and Gifting
    Dark glass bottles protect flavor from light and make homemade vanilla easy to store or gift.


    Why Artificial Vanilla Flavoring Falls Short

    Many inexpensive vanilla products are not pure vanilla extract. Instead, they often include:

    • Artificial vanillin rather than flavor extracted from real vanilla beans
    • Added stabilizers and flavor enhancers
    • Lower-quality alcohol bases that lose flavor during baking

    These shortcuts can result in a flat taste that doesn’t hold up in cookies, cakes, and frostings. Traditional vanilla extract is made by slowly extracting flavor compounds from whole vanilla beans, creating a deeper and more complex flavor.

    If you’ve heard claims about artificial vanilla being made from unusual sources, it’s worth separating myth from fact. I explain where those rumors came from here → No, Artificial Vanilla Is Not Made From Beaver Glands (Here’s the Truth)


    What You Need to Make Baking-Grade Vanilla Extract

    https://i0.wp.com/12-kitchens.com/wp-content/uploads/2024/07/IMG_0986.jpg?resize=1024%2C682&ssl=1
    https://littlespoonfarm.com/wp-content/uploads/2021/07/vanilla-extract.jpg

    This method produces a strong, baking-grade vanilla extract, not a watered-down version.

    Ingredients

    10–12 whole vanilla beans per 8-ounce jar
    Using fewer beans is the most common reason homemade vanilla turns out weak.

    A neutral alcohol with a relatively high alcohol content
    (Use the highest-proof neutral spirit that is legally available in your area.)

    Higher alcohol content helps extract flavor compounds more efficiently and supports long-term preservation.


    Recommended Supplies

    The following items make the process easy and consistent from start to finish.

    Vanilla Beans (Baking Grade)

    Quality beans are the most important factor in flavor.


    Glass Jars for Infusion and Aging

    These jars are ideal for steeping vanilla while it develops flavor.


    Dark Glass Bottles for Storage and Gifting (Includes Funnel)

    Once your vanilla is finished, transferring it into dark glass bottles helps protect flavor from light exposure. This set also includes a funnel for clean, easy pouring.

    These bottles work well for:

    • Long-term storage
    • Homemade gifts
    • Refilling smaller kitchen bottles

    How to Make Homemade Vanilla Extract

    https://i0.wp.com/www.zoebakes.com/wp-content/uploads/2008/01/cutvanillabean01.jpg?ssl=1

    Step 1: Prepare the Beans

    Using a sharp knife, slice each vanilla bean lengthwise to expose the interior.

    Step 2: Add Beans to the Jar

    Place 10–12 split beans into a clean glass jar.

    Step 3: Add the Alcohol

    Pour the alcohol over the beans until fully submerged. Seal the jar tightly.

    https://www.seriouseats.com/thmb/6w6o6ZV-RqdDoICUZ4zmu3WuqZU%3D/1500x0/filters%3Ano_upscale%28%29%3Amax_bytes%28150000%29%3Astrip_icc%28%29/20221214-HomemadeVanillaExtract-AmandaSuarez-14-d22cb87d5347404d87a3c1ad64b00b64.JPG

    Step 4: Store and Shake

    Store the jar in a cool, dark place. Shake gently once or twice per week.

    Step 5: Allow Time to Extract

    • Minimum use: 8–12 weeks
    • Best flavor: 6 months or longer
    https://i0.wp.com/www.zoebakes.com/wp-content/uploads/2012/01/vanilla-extract-2.jpg?fit=640%2C960&ssl=1

    When the vanilla reaches your desired strength, transfer it to dark glass bottles for storage or gifting.

    Homemade vanilla continues to improve for months and can be reused indefinitely by topping off with more alcohol as needed.


    Alcohol Selection Guidance

    Homemade vanilla extract is traditionally made using a neutral alcohol with a relatively high alcohol content. Higher alcohol content improves flavor extraction and helps preserve the extract long-term. Always purchase and use products that are legally available in your area and follow local laws.

    Does Homemade Vanilla Work for Baking?

    Properly made homemade vanilla extract performs just as well as — and often better than — store-bought vanilla in baked goods. The higher bean concentration creates stronger aroma, better heat stability, and fuller flavor in cookies, cakes, and frostings.

    Many bakers find they can use slightly less homemade vanilla than artificial vanilla flavoring to achieve the same result.


    How to Use Homemade Vanilla Extract

    Use homemade vanilla just like store-bought extract:

    • Cookies, cakes, and muffins
    • Frostings and glazes
    • Custards and ice cream
    • Pancakes, waffles, and syrups

    Because homemade vanilla is often more robust than artificial vanilla flavoring, many bakers find they can use slightly less per recipe.


    Storage, Shelf Life, and Gifting

    Homemade vanilla extract:

    • Has an indefinite shelf life when properly stored
    • Continues to improve with age
    • Store finished vanilla in dark glass bottles to protect flavor from light exposure and extend shelf life.
    • Makes thoughtful, practical gifts

    What You Need to Make Baking-Grade Vanilla

    To make strong, baking-grade vanilla extract from start to finish, you only need three things:

    • Whole vanilla beans in the proper quantity
    • A high-proof neutral alcohol
    • Glass containers for steeping, storage, and gifting

    All of these were covered in detail above, including why quality matters for flavor and shelf life.

    These are the same type of vanilla beans mentioned above if you want the easiest place to start.


    Why Homemade Vanilla Is Worth Making

    Making your own vanilla:

    • Uses real ingredients
    • Avoids artificial flavoring
    • Delivers better baking results
    • Costs less over time
    • Replaces store-bought extract permanently

    Once you make it, it becomes a pantry staple you’ll always want on hand.

    Learn More About Artificial Vanilla Flavoring

    If you’re curious about claims surrounding artificial vanilla flavoring, this related guide breaks down where those myths came from and what artificial vanilla is actually made from today:
    No, Artificial Vanilla Is Not Made From Beaver Glands (Here’s the Truth)

    If you’ve also tried DIY plug-in refills, this breakdown explains why most recipes fail and what actually makes them work.

  • The One Ingredient That Makes DIY Plug-In Refills Actually Work

    The One Ingredient That Makes DIY Plug-In Refills Actually Work

    Disclosure: This post may contain affiliate links. If you click and make a purchase, I may earn a small commission at no extra cost to you.

    If your DIY plug-in refills smell great at first but fade within just a few days, the issue usually isn’t your fragrance oil — it’s the base.

    Most homemade recipes skip one simple ingredient that controls evaporation and helps the scent last longer.

    That ingredient is fractionated coconut oil.


    In this guide, you’ll learn:

    • Why most DIY plug-in refills lose strength so quickly
    • How fractionated coconut oil improves scent longevity
    • The exact mixing ratio that works best
    • The best fractionated coconut oil to use for plug-in refills

    The Ingredient That Makes the Difference

    If you want your refill to last more than a few days, this is the base that works best:

    Fractionated Coconut Oil (FCO)

    Fractionated coconut oil is lightweight, odorless, and designed to carry fragrance evenly without clogging your plug-in unit. Unlike thicker oils, it allows consistent diffusion while slowing evaporation.


    🔥 Quick Fix: Make Your DIY Plug-In Refill Last Longer

    Use this simple ratio:

    • 75% Fractionated Coconut Oil
    • 25% Fragrance Oil

    Shake thoroughly for 10–15 seconds before inserting into your plug-in device.

    This balance slows evaporation while still delivering strong scent throw.

    If you don’t already have it, this is the fractionated coconut oil that works best:

    👉 View it on Amazon

    Fractionated coconut oil and fragrance oil measured for 75 25 DIY plug-in refill ratio

    Why DIY Plug-In Refills Stop Working So Quickly

    Most homemade recipes focus only on fragrance strength. But plug-in units rely on controlled evaporation. If the base evaporates too quickly, the scent fades fast — no matter how strong the fragrance oil is.

    There are three common problems:

    • Using fragrance oil without proper dilution
    • Using thick carrier oils that clog wicks
    • Using alcohol-heavy mixtures that burn off too fast

    The real issue is evaporation control.


    The Role of the Base Oil

    Plug-in air fresheners work by drawing liquid up through a wick and slowly diffusing it with heat. If the liquid is too thin, it evaporates too quickly. If it’s too thick, it won’t diffuse properly.

    Fractionated coconut oil is ideal because it is:

    • Lightweight and stable
    • Nearly odorless (won’t alter fragrance profile)
    • Slow-evaporating compared to alcohol
    • Compatible with most plug-in refill bottles

    This creates a controlled release instead of a short burst.


    Typical DIY Refill vs Properly Balanced Refill

    Common DIY BlendWith Fractionated Coconut Oil
    Fades in 2–3 daysLasts 1–2+ weeks
    Inconsistent scentEven diffusion
    Wasted fragrance oilEfficient use of oils
    Risk of cloggingSmooth wick performance

    The difference isn’t more fragrance — it’s a better base.


    How to Mix Your Refill Correctly

    1. Measure 75% fractionated coconut oil into your refill bottle.
    2. Add 25% fragrance oil.
    3. Shake thoroughly for 10–15 seconds.
    4. Let the mixture settle before inserting into the plug-in unit.

    For a standard 30 ml bottle:

    • 22–23 ml Fractionated Coconut Oil
    • 7–8 ml Fragrance Oil

    Always avoid overfilling and ensure your plug-in unit is compatible with oil-based refills.


    What to Look for When Buying Fractionated Coconut Oil

    Not all carrier oils are the same. For plug-in refills, choose one that is:

    • 100% pure fractionated coconut oil
    • Clear and odorless
    • Packaged in a bottle with a controlled pour spout
    • Cosmetic or aromatherapy grade

    This is the one that consistently works best:

    One consistently reliable option is this fractionated coconut oil on Amazon.


    Key Takeaways

    • Most DIY refills fail because of improper evaporation control.
    • Fractionated coconut oil acts as the ideal carrier base.
    • A properly balanced blend prevents rapid evaporation and weak scent output.
    • Using the right base oil improves both longevity and performance.

    If you want your DIY refills to actually last, start with the right base:

    👉 Check current price on Amazon


    Homemade DIY plug-in air freshener installed in wall outlet

    Related Articles